Dress · Uncategorized

Anna Dress: By Hand London – Fitting Series

fullsizeoutput_f3

I’ve been really happy with my sewing this year, I have learned so much in terms of fitting. I can get a lot of garments to a pretty well fitting point before ever cutting my fabric, without muslining. But this has come from getting the fit wrong and learning from it. I have several garments in my closet I love, but I didn’t know how to fit as well as I do now. So I want to revisit some of those patterns in a series.

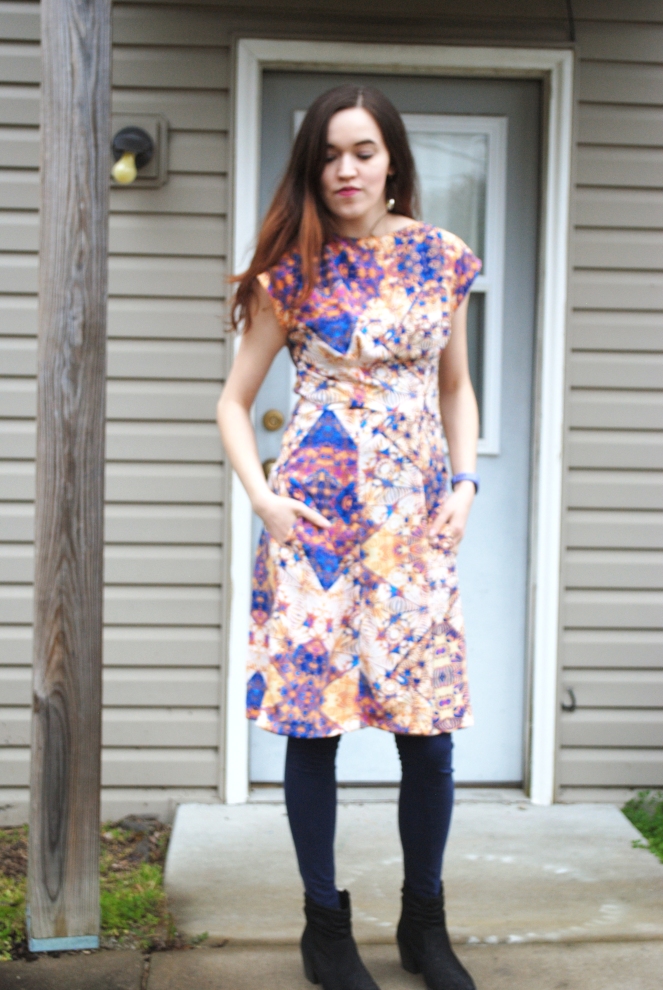
I made the Anna Dress exactly 2 years ago for sew my style. Anna Dress – By Hand London- November #SewMyStyle I don’t love my pattern placement on it but I also have too much room in the bust. However, I do still have this dress in my wardrobe, because I still love how I feel in it, the pattern is a great silhouette for me. Which is why it was the first pattern I wanted to revisit.

DSC_0016

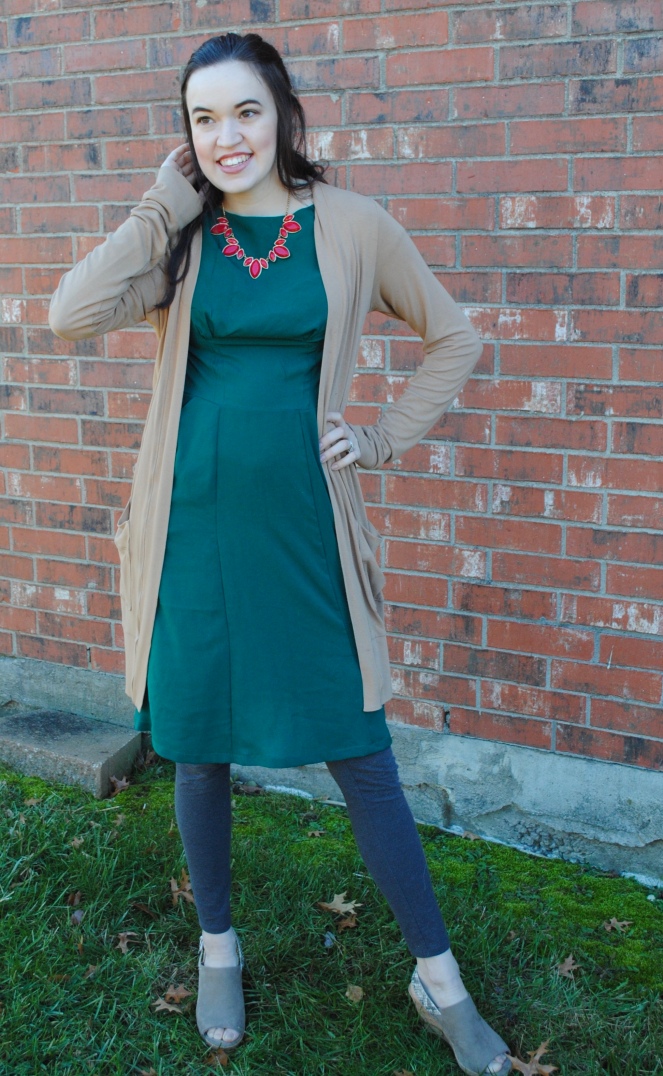
I wanted this Anna to be my holiday Christmas dress. I love making my Christmas dress either a solid red or green so I can adapt it more for Christmas or more for everyday wear and get more use out of it. The last few years I’ve gone with red so this year I went with green.

fullsizeoutput_f6

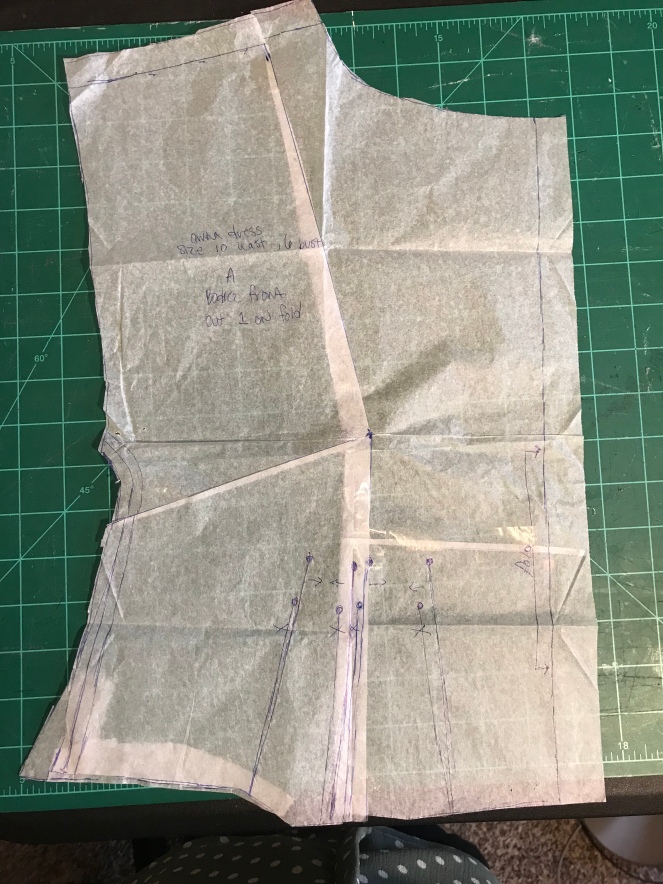
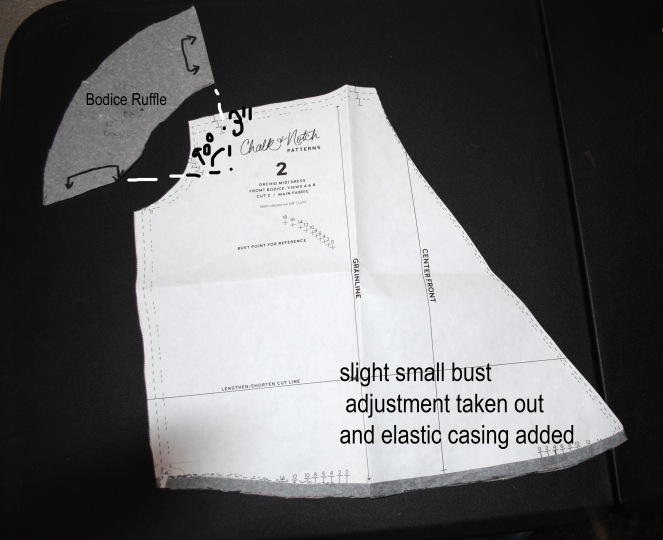
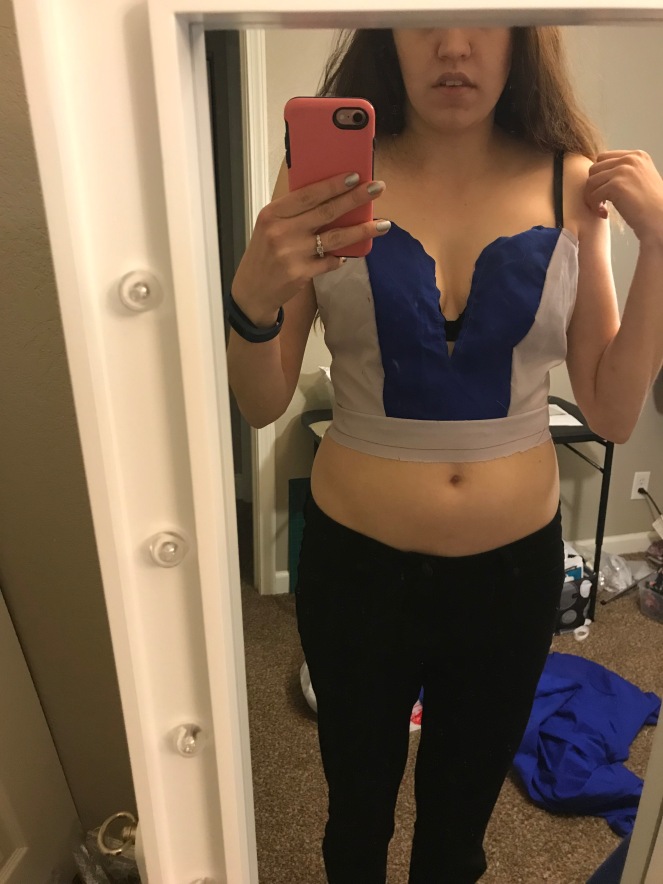
I made quite a few small adjustments. Let’s talk through it. First I followed the tutorial on By Hand London for a small bust adjustment. The first time I made this garment I sewed up a 6 graded to a 10. If I was to make it for the first time again, I would have done a straight size 10 with a bigger SBA but I wanted to work from the pattern I used last time so I could eliminate most of the guesswork. I took about 1/2″ out of the pattern piece, totaling 1″ less in the full bust of the garment.

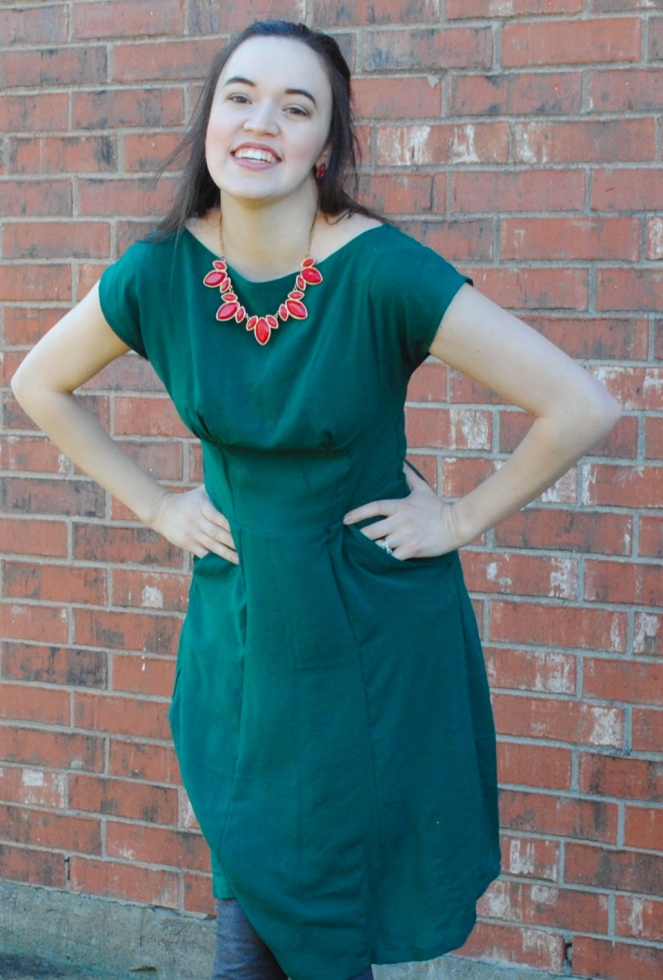
I also noticed sometimes the neckline rides up on me, and I have to adjust it down. I think you can even see the difference in the photos of my 1st one. So I lowered the neckline 1/4″. I made this adjustment on the front and on the front facing.

fullsizeoutput_f5

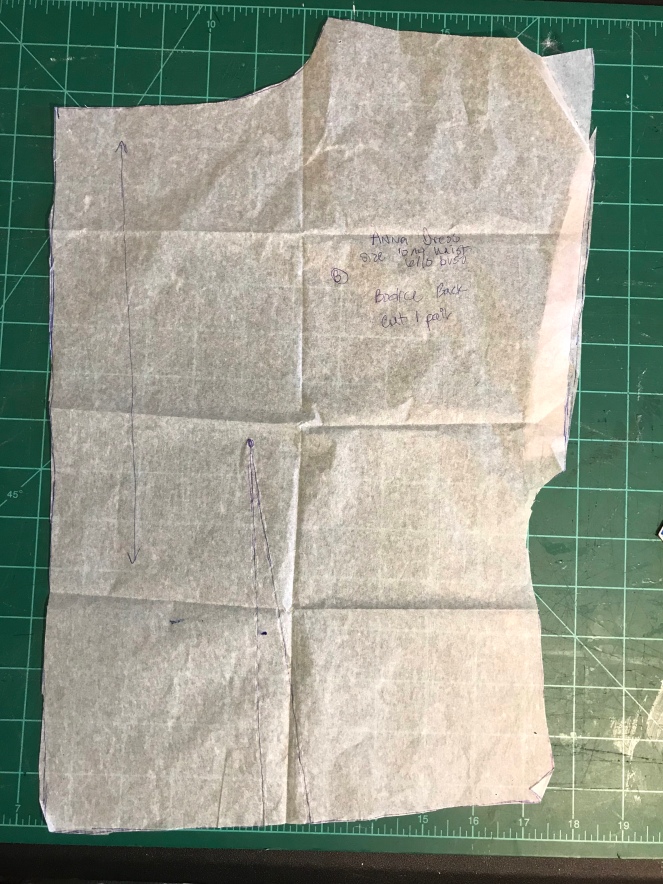
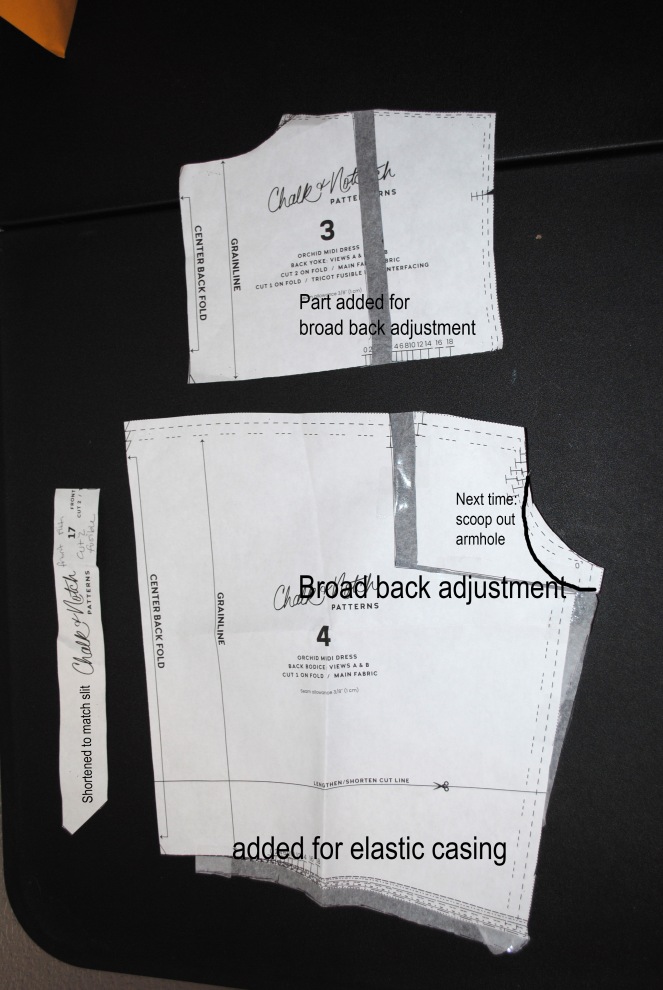
I made a few adjustments on the back too. Since I was using a 6 graded to a 10 rather than a straight 10, the back is a smidge tight, so I added a little more to the back at the armhole. I also found that the back stands away from my body a bit, so I took 1/4″ out of the center back at the very top, grading back to where it was, so the center back was not a straight line anymore, which I was a bit nervous about but found it to be perfect.

fullsizeoutput_ee

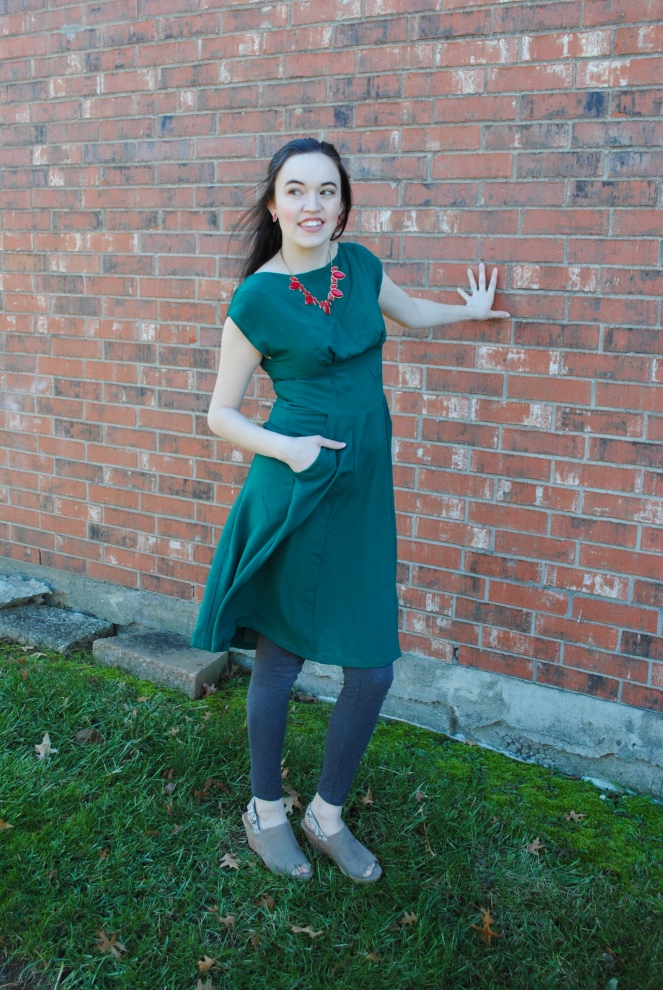
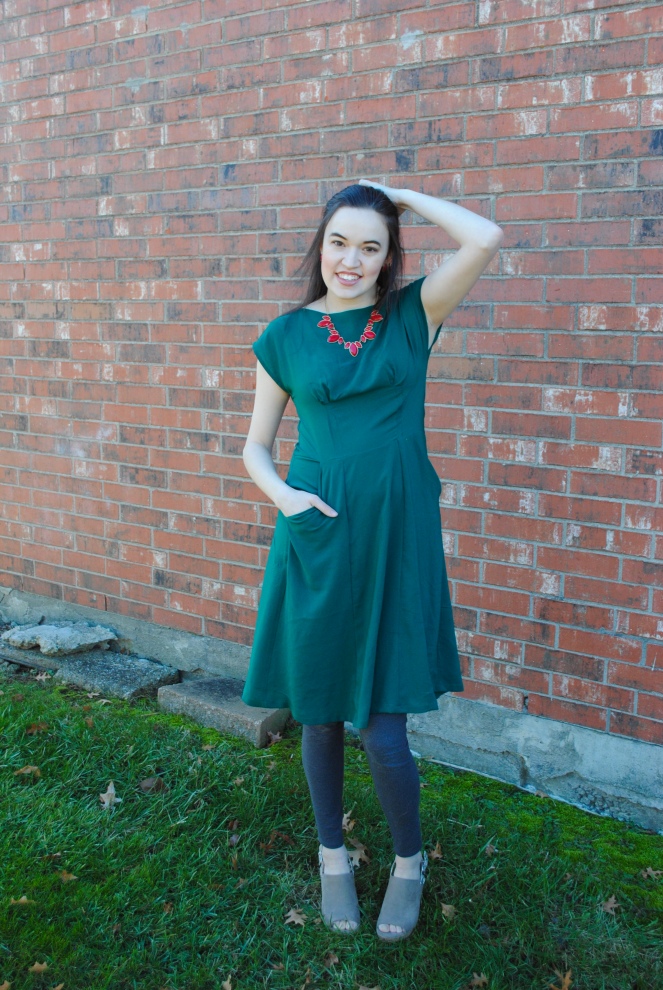
That was my fitting adjustments. But I also followed By hand London’s Slash pocket tutorial, she had her pockets more curved but I just wanted a slash. Mostly just did this to add some interest since it’s all solid and add variety from my last Anna.  The one thing I would change to this make would be deeper pockets. I felt like they were big while I was making them, but they weren’t as big as I thought when I tried them on.

fullsizeoutput_ea

This is the 1st time I have rebought fabric for an entirely different project. You may remember this fabric from Sewcial Mashup: Lucerne & S8601. I absolutely loved the color on me and felt it would be perfect for this dress. I got tons of feedback on that make for the color of it.

fullsizeoutput_ec

Pattern: Anna Dress By Hand London

Fabric: Rayon Challis from Fabric.com

Size: 6 bust graded to 10 waist

Alterations: Small bust adjustment, lowered neckline, broad back adjustment, took width out of back neckline, slash pockets

Overall: A success! I feel like I gave this pattern justice. Would totally make again sometime. It’s a great pattern for me.

fullsizeoutput_f1

Dress · Uncategorized

Orchid Midi Take 2 (bodice ruffle hack)

orchidhack1

I’m having my Bridal Shower on my family’s side at the end of March. So I started brainstorming what I wanted to wear to it. I really loved the Orchid Midi I made for my engagement photos for Minerva Crafts, but I had some fit issues. I felt really restricted in the back armhole/shoulder area. I thought this was the perfect opportunity to improve the pattern for me.

orchidhack2

One of my sewing goals for 2019 is to create patterns multiple times to prefect finishings and fit. Chalk and Notch has finishings nailed so for me it was all about fit.

I also had a design changes to make it more my style. So I’ll divide my changes to the pattern between fit changes and style changes.

Fit changes:

  • Broad back adjustment
    • I used the Palmer & Pletch fitting book to do the adjustment. This is an uncommon adjustment for me so I followed it best I could. Adjustment did help a lot but I realized it wasn’t the only problem.
  • Dug out the armhole
    • I actually didn’t do this on the pattern, I was hoping the broad back would be all I needed. The broad back adjustment helped a lot but the armhole was just too small for me. So I winged digging out some of the armhole when it was all finished. I am marking on my pattern photos my plan for next time on the back, I didn’t show you that same on the front, but I would adjust both.

Style Changes:

  • Bodice Ruffle
    • I thought the bodice ruffle would be so cute. I have seen so many wrap dress patterns from the big 4 with bodice ruffles and have been envying this look.
    • It was really easy to do. I did the math for a full circle ruffle using the bodice as the diameter.  It breaks down to 3″ from the 90 degree angle
    • I made it 3″ long, but when you equate hem and attaching to the bodice, it was starting to get too small, so I didn’t line the ruffle up exactly with the raw edge of the bodice.  Next time I would add 1/4″ to the width.
    • I did a small narrow hem by stitching 1/4″ then using that to fold it twice.
    • When attaching it, I did the binding edgestitching not being attached to the ruffle so that the ruffle hides that stitching.
    • I kept basted the short edges of the ruffle to the bodice so those raw edges would be taken care of with the bodice.
  • Elastic Casing
    • The drawstring isn’t really my jam. I love elastic casings.
    • I added 3/8″ to the bodice, skirt, and pocket pieces, giving me 3/4″ to create the casing.
  • Shortening the midi
    • The midi length is great for winter but I wanted a more summer look. So I shortened it 2″ before the slit and 5″ after. That’s a total of 7″. I’m really happy with the length. I didn’t want the slit to come up too high or the slit to not have much length at all. I think I nailed that balance.

orchidhack9orchidhack8orchidhack7

The fabric is a cotton poplin from fabric.com. I know someone else had gotten the fabric from Blackbird fabrics, so it shouldn’t be too hard of a fabric to find. I love it. Beautiful dress fabric.

orchidhack3

I ordered 3 yards of this fabric and used every bit of it. Keep in mind I used the same fabric for the pockets and left off the pocket triangle piece and I followed Chalk and Notch’s original intent for lining the sleeves, you could save a little fabric by hemming the sleeves instead. I was one circle away from being able to line the bodice ruffles. Those got hemmed.

orchidhack4

Pattern: Orchid Midi by Chalk and Notch

Size: 4

Fabric: Cotton Poplin

Alterations: quite a bit, read above

Overall: I still love the design of this dress. It’s june’s Sewmystyle, so I imagine I’ll be sewing it again altering the armhole. This dress is pretty much ideal for me.

orchidhack6

Uncategorized

Wedding Dress: Part 2 (Bodice Fitting)

IMG_3724

I’ve been working quite hard on the toile of the bodice of my wedding dress. The skirt has quite a ways to go but I’m ready to share my fitting process for the bodice.  My design sketch is above but my full design post is Wedding Dress: Part 1 (planning)

Image result for mccalls 7124

I’m using McCalls 7124. I initially bought the pattern for the tiered skirt, however I’ve changed my design to be a long elegant tulle skirt. However, I still thought this pattern had a good base for my bodice, I knew there would be some fit issues as McCall’s typically doesn’t fit my well. Particularly in the boob area.

I started by tracing off the pattern in my standard McCall’s size with is a 10 in the bust, 12 in the waist, and 14 in the hips. This did result in the waistband being inverted from it’s original shape, but it worked well for me.

I should have wrote this as I was going as I’ve forgotten some of the changes, but I’ll try to show you everything I can. I wanted to start off as close as I could, so I made design changes before ever making a toile. The first was I wanted a low V, so I adjusted the CF which you can see in the photo. I also lowered the back so it would be mostly backless, meeting at the zip.

top first version

When I sewed up this version, it wasn’t too bad. The V was much bigger than I’d like, so I knew I had to cut it closer and use a smaller seam allowance at the V. I struggled with knowing how to adjust it as it didn’t have any boning or interfacing so it was hard for it to hold itself up with no back. You can sort of see the pin on the side seam I added. I did know I needed to take out a little at the top of the side seam.

IMG_3746

I also worked on the Overlay at the same time. It took me a little bit to wrap my head around it. At first I thought I would just cut out overlay pieces in the bodice as well and follow the pattern to get the sequins all over, but the deep V made that difficult and I didn’t want the princess seams to stand out. I really wanted the overlay to go over the bodice, like the David’s Bridal dress I liked. So what I did was overlap all the pieces to create the overlay after making my initial design changes. I wanted a cap sleeve, rather than a tank top looks, so I borrow my Anna dress from By Hand London, to see the shape of the sleeve. I moved the start of  the sleeve over, adjusting the back piece as well.

overlay1

overlay

Overlapping this way created a huge dart. So I knew it wasn’t going to work but I did think sewing it up would help me know how to change it.

IMG_3874

The dart didn’t even line up in the right spot with my bust. So much extra room. I thought I might need a small bust adjustment but I needed to change that dart around. So I just googled how to move a dart from the waist to bust. I didn’t want to move the whole thing but just a small part. There are 3 main lines you need to move the dart, which I put in the pic below.  I moved the dart as well to match my bust. Then I squished out the bust dart in pattern form. You can also see in the photo below that I did make a small bust adjustment.

IMG_3764

I pinned this tissue to my dress form and could tell it would put me a lot closer, so I then sewed it up with a lot of success. I adjusted the neckline a bit, making it a bit lower and bringing the neckline in a tad so it wouldn’t fall off my shoulders. The waist darts needed to be a smidge bigger as the length was too long for the waistband.

IMG_3872

The back of the overlay comes down into a triangle.

IMG_3873.JPG

Sorry to jump around but I wanted to follow my process. At this point I tried the bodice piece on again and this time I could clearly see it needed a small bust adjustment, the length was too long. I followed the same By Hand London tutorial I used in my jumpsuit

IMG_3883

I feel pretty good about the fit of the pieces, my fabric is here. I’m ready to cut and make the bodice. You’ll have to wait for that reveal. I know I missed some changes to the patterns, if you are interested in each mock up and the changes, you can go through my highlight reel on my instagram, I saved the bodice testing there.